edit 20th November, 2016 - now everything in this post is abstracted away and available in the googleComputeEngineR package - I would say its a lot easier to use that. Here is a post on getting started with it. http://code.markedmondson.me/launch-rstudio-server-google-cloud-in-two-lines-r/
This blog will give you steps that allows you to run on Google Compute Engine a server that has these features:
- RStudio Server instance with multiple login.
- Apache to host a welcome webpage.
- Restart the server to securely load private Github R packages / Docker images.
- A shared cron folder that runs every day at 0630 that user’s can put their own scripts into.
It is inspired by conversations with @Chipoglesby and @RichardFergie on twitter about this kind of setup, and was useful to me as a way to organise my thoughts on the subject ;). If you have any suggestions on improvements please tweet to me at @HoloMarkeD or email via the blog.
Motivation: In search of a 4-day work week
I’ve just started a new job at IIH Nordic where a part of my duties is to look for ways to automate the boring tasks that come up in a digital web analytics team.
IIH Nordic have an aim to introduce a 4-day work week within a couple of years, so the motivation is to find out how to save 20% of the current work schedule without harming productivity. Downloading data and creating reports is a big time-sink that looks ripe for optimisation.
Introducing the wonders of R to a team
The current strategy is to introduce the team to R and train everyone up in running simple scripts that download the data they need for their reports. We will tackle data transformation/ETL, statistics and visualisation/presentation later, but the first goal is to solve the “How can I get data” problem.
I’m well placed to help due to writing googleAuthR, so have played with R libraries with simple authentication and functions to download from Google Analytics, Search Console, BigQuery, as well as using Randy Zwitch’s Adobe Analytics package. These libraries alone cover 90% of the data sources we need.
Why use RStudio Server in the cloud?
We’ve had a few internal workshops now and the team look comfortable writing the R-scripts, but during the process I noticed a few issues that are solved using RStudio Server. Using it means:
- Everyone is working on the same versions and libraries.
- Scripts can be logged for quality and errors.
- Scheduled scripts can be run from the server not someones local PC.
- Training material can be made available on same server.
- Web accessible private login for remote working.
- Can use R from an iPad or Google Chromebook!
Setting up RStudio Server on Google Cloud Compute (GCE)
I have a old blog post on the installation of RStudio Server on GCE, but this will update that since technology and my understanding has improved.
A brief overview of the components are below:
Docker
Docker is a virtual machine-lite that can run on anything, which means that the set-up is very transferable to other operating systems like Windows or OSX.
It offers easier set-up via pre-created Docker images, and is embraced and well supported by Google via its container registry, giving you unlimited private repositories, unlike Docker Hub that gives you only one. It provides reproducibility and scale.
Github
Github is the go-to place to review and share code, and offers web-hooks that means it can push updates when you update a repository. Every coder should use a version control system so its good practice to introduce it to the team, and it also allows installation of experimental and private R packages via devtools::install_github command.
Google also has support for using Github via its Cloud Source Repositories.
Google Compute Engine
The up-and-coming pretender to AWS’s cloud computing crown, the Google Cloud is a natural choice for me as it offers integrations for Google Analytics and BigQuery. The server images it offers have a great API and user interface, and it offers very quick I/O and restart times on Google’s world-class infrastructure, and the Docker container support as mentioned makes things more simple to scale in the future.
Setup steps
Now we get to the actual commands you use to get things up and running. It will give you:
- RStudio Server instance with multiple login.
- Apache to host a welcome webpage.
- Restart the server to load your private Github R packages if you have any.
- A shared cron folder that runs every day at 0430 that user’s can put their own scripts into.
In general I use the command line from a local terminal, but all actions can also be carried out within the Compute Engine web interface.
Create the Google Cloud Engine
Here is a reference for GCE docker enabled VMs.
- Download and install the Google Cloud SDK
- Authorize and set-up billing for a Google Project
- Start up your terminal and set your project and zone:
  gcloud auth login

  gcloud config set project your-project-name

  gcloud config set compute/region europe-west1

  gcloud config set compute/zone europe-west1-b
- Issue this gcloud create command to start up a docker enabled instance:
edit 18th September 2016 to update to new images as per https://cloud.google.com/compute/docs/containers/vm-image/
gcloud compute instances create your-r-server-name \
  --image-family gci-stable \
  --image-project google-containers \
  --tags http-server
  --scopes https://www.googleapis.com/auth/devstorage.read_write \
  --machine-type n1-standard-1
Unlike previously, this new (from Aug 2016) container ready VM comes with Google Cloud Storage scopes already set, so you can use private docker repos.
The --tags flag sets the default http firewall rules to apply to this instance so we can reach it via the internet on port 80.
You should now be able to see your instance has launched in the Google Compute Dashboard
Create persistent disks
Anything new in the Docker container will disappear on a restart if you also don’t commit and push the image, so to avoid that data and scripts are linked to the container via the --volumes command.
We also link to persistent disk rather than the VM’s own, which has the advantage of being able to connect (read-only) to multiple servers at the same time, should you need it. This also means if you need a more powerful server, you can safely create one knowing you will have the same data and scripts available.
gcloud compute disks create --size=200GB my-data-disk
gcloud compute instances attach-disk your-r-server-name --disk my-data-disk
Initial Configuration on Google Compute Engine
- Login to GCE
gcloud compute ssh your-r-server-name
We are now making commands from within the GCE VM.
If you have any problems, use the web interface to login via the Cloud Shell. Sometimes you had to add your username to the instance, and then login with that user like:
gcloud compute ssh user@your-r-server-name
See here for more diagnostics help.
- Format and mount the persistent disk
See instructions here.
```sh
sudo mkfs.ext4 -F -E lazy_itable_init=0,lazy_journal_init=0,discard /dev/disk/by-id/google-persistent-disk-1

##make mount point
sudo mkdir /mnt/data/
sudo mount -o discard,defaults /dev/disk/by-id/google-persistent-disk-1 /mnt/data/

## user folders
sudo mkdir /mnt/data/home/

## custom packages
sudo mkdir /mnt/data/R/

##permissions
sudo chmod a+w /mnt/data

## make it mount automatically each time
echo '/dev/disk/by-id/google-persistent-disk-1 /mnt/data ext4 discard,defaults 1 1' | sudo tee -a /etc/fstab
```
- Install and Configure Apache
This gives you a user-friendly webpage pointing to the RStudio login, and I also use it as a place to put training material such as RMarkdown documents.
I suppose this could also be done via another Docker container if you have a more complicated Apache setup to use.
The ProxyPassMatch line is needed for the Shiny engine thats within RStudio Server to work.
sudo apt-get update
sudo apt-get -y install apache2

## Need proxy and proxy_http to create nice URLs, proxy_wstunnel for Shiny
sudo a2enmod proxy proxy_http proxy_wstunnel

## this may be 000-default.conf rather than 000-default
## depending on version of apache
echo '<VirtualHost *:80>
        ServerAdmin your@email.com

        DocumentRoot /var/www

        ProxyPassMatch ^/rstudio/p/([0-9]+)/(websocket|.*/websocket)/$ ws://localhost:8787/p/$1/$2/
        ProxyPass /rstudio/ http://localhost:8787/
        ProxyPassReverse /rstudio/ http://localhost:8787/
        RedirectMatch permanent ^/rstudio$ /rstudio/

        ErrorLog ${APACHE_LOG_DIR}/error.log

        LogLevel warn

        CustomLog ${APACHE_LOG_DIR}/access.log combined

</VirtualHost>' | sudo tee /etc/apache2/sites-enabled/000-default

sudo service apache2 restart

## A startup HTML page for you to customise
echo '<!doctype html><html><body><h1>RStudio on Google Cloud Compute</h1><ul><li><a href="./rstudio/">RStudio Server</a></li></ul></body></html>' | sudo tee /var/www/index.html
You should now be able to see your server running Apache.
I then upload a website to /var/www/ via the gcloud copy-files command
An example, assuming your website is in your local folder ~/dev/website/www/
sudo gcloud --project your-project-name compute copy-files ~/dev/website/www/ your-r-server-name:/var/
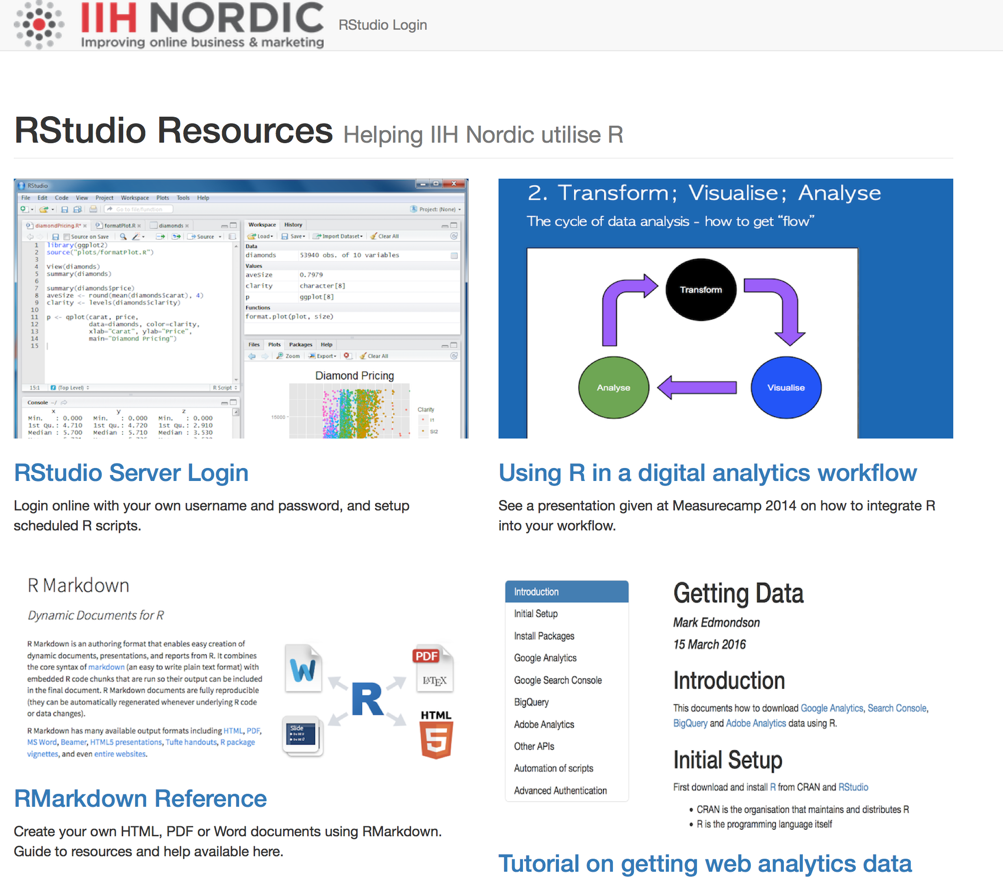
Here is what we have at IIH Nordic:
A download folder
Now, you may want to have a dropbox style folder for the data your scripts are running, say scheduled data downloads. There are a few ways to skin this cat, such as uploading to cloud storage in your script, but the simplest way for me was to use the Apache functionality to create a logged in download area.
For this, you need to:
-
Create a folder on your data disk where scripts will dump their data:
mkdir /mnt/data/downloads -
Create a symlink to an Apache web server folder
ln -s /mnt/data/downloads /var/www/downloads -
[optional] Style the folder with CSS so it looks nice using say Apaxy
-
Update your Apache config to have logged in access to the folder.
The extra Apache config is below. It requires installation of sudo a2enmod headers and a restart.
### In download folder, auto-download .txt,.csv, and .pdf files
### Protect with a password
<Directory /var/www/downloads/>
      <FilesMatch ".+\.(txt|csv|pdf)$">
          ForceType application/octet-stream
          Header set Content-Disposition attachment
      </FilesMatch>
      AuthType Basic
      AuthName "Enter password"
      AuthUserFile /etc/apache2/.htpasswd
      Require valid-user
      Order allow,deny
      Allow from all
      Options Indexes FollowSymLinks
      AllowOverride All
</Directory>
Download and Run the RStudio Server Docker image
We first download a pre-prepared RStudio Docker container created by the Rocker team led by Dirk Eddelbuettel. This is what our custom image will be based upon. Here we download a variant that also loads RStudio and all of Hadley’s packages to give us a great base to work from.
Most of the below is gleaned from the Rocker Wiki.
The below docker command runs the docker image - if that image is not available it will look for the image on Docker hub and download. This will take a long time as it downloads everything, perhaps time to put the kettle on.
Subsequent times will load quickly from local version.
We run it with a custom username and password we want, as this will be exposed to the web and we don’t want the defaults to be exposed.
## Run the docker image with RStudio and Hadley Universe
sudo docker run --name rstudio-server -d -p 8787:8787 \
     -e USER=YOUR_USERNAME -e PASSWORD=YOUR_PW \
     -v /mnt/data/:/home/ \
     rocker/hadleyverse
Configure RStudio Server Docker image
Now it could be that you are done from here - you should have a working RStudio interface available on the IP of your container (http://your-vm-ip-address/rstudio/auth-sign-in).
But we will configure it a bit more, adding users, more packages, and scheduled jobs.
If you have a lot of configurations then it is better to create your own DOCKERFILE and build the image yourself.
We log in to the running docker container here:
sudo docker exec -it rstudio-server bash
This is a good one to remember for when you are doing future customisation.
You are now in the Docker container.
Install stuff then CTRL-D to come out again to commit and push your changes.
## Make users that will create a directory on the data disk
adduser mark

## [Optional] Install packages
## install as sudo to ensure all user's have access
sudo su - -c "R -e \"install.packages('abc', repos='http://cran.rstudio.com/')\""

## [Optional] Install libraries from Github packages
sudo su - -c "R -e \"devtools::install_github('MarkEdmondson1234/bigQueryR')\""

## [Optional] Install libraries from private Github packages
sudo su - -c "R -e \"devtools::install_github('MarkEdmondson1234/privatePackge', auth_token=YOUR_GITHUB_PAT)\""
Configure scheduling via CRON
A big reason to have a server is for the team to schedule their data fetching scripts. We achieve this by running CRON within the Docker container (to ensure all packages are installed) and then providing a link to a folder that runs the script when they need it.
First we install CRON in the container:
## Download and install cron
sudo apt-get update
sudo apt-get -y install cron nano
sudo service cron start
We can then schedule scripts via RScript to run daily.
## annoying nano bug in Docker
export TERM=xterm

## open up the cron editor (select 2)
sudo crontab -e

## add this to the bottom of file
## runs script at 0420 every day
# m h  dom mon dow   command
20 4 * * * /home/cron/r-cron.R >/home/cron/cronlog.log 2>&1

## CTRL-X and Y to save changes
The r-cron.R script needs to have #!/usr/bin/Rscript at the top to run correctly.
#!/usr/bin/Rscript
cat("Cron script started: ", date())

....do R stuff

cat("Cron script stopped: ", date())
Repeat for all scripts you want to run.
Sending emails
Its useful to send an email once a script has run successfully (or not), one that uses Mailrun is below:
#' Email a user a report is ready
#'
#' Requires an account at Mailgun: https://mailgun.com
#' Pre-verification can only send to a whitelist of emails you configure
#'
#' @param email Email to send to
#' @param mail_message Any extra info
#'
#' @return TRUE if successful email sent
#' @import httr
#' @export
sendEmail <- function(email = "XXXXX@you.com",
                      mail_message = "Hello"){

  url <- "https://api.mailgun.net/v3/sandbox5f2XXXXXXXa.mailgun.org/messages"
  ## username:password so api_key is all after the api:
  api_key <- "key-c5957XXXXXXXXXXXbb9cf8ce"
  the_body <-
    list(
      from="Mailgun Sandbox <postmaster@sandbox5XXXXXXXXa.mailgun.org>",
      to=email,
      subject="Mailgun from R",
      text=mailmessage,
    )

  req <- httr::POST(url,
                    httr::authenticate("api", api_key),
                    encode = "form",
                    body = the_body)

  httr::stop_for_status(req)

  TRUE

}
Scheduling packages
There is also an R package that manages cron, cronR , which now has an RStudio Server addin, which looks like a good option.
Pushing the Docker changes
We now commit and push changes to the Google Docker Hub. The Docker command docs are here.
## CTRL-D to come out of the docker container again

## to get the container id e.g. c3f279d17e0a
sudo docker ps

## commit with a message
sudo docker commit -a "Mark" -m "Added R stuff" \
    CONTAINER_ID yourname/your-new-docker-image

## list your new image with the old
sudo docker images

## tag the image with the location
sudo docker tag yourname/your-new-docker-image \
                gcr.io/your-project-id/your-new-docker-image

## push to Google Docker registry
sudo gcloud docker push \
     gcr.io/your-project-id/your-new-docker-image
You could now pull this image using:
sudo gcloud docker pull \
  gcr.io/your-project-id/your-new-image-name
…but this will be taken care of in the startup behaviour below.
Remember to commit any changes each time you change the configuration of RStudio.
Setup restart behaviour
Now we want to configure the above to happen everytime the VM starts up. I use a startup script for pulling the latest docker image and updating any packages or data from github so to refresh I just need to restart the server.
Download latest custom packages and data
In the custom metadata for the VM, we need the field startup-script and then optional other metadata.
The metadata is kept seperate away from your running containers, but available via the Google metadata commands. This can be used for things like passwords and security settings you would prefer not to be shipped in a Docker container, and is easier to manage - just edit the metadata keys.
Create one metadata field per bash script variable - examples below:
github-user: your-githubname

github-repo: your-github-repo

github-data: your-github-data

github-pat: your-github-pat
This startup script loads the metadata above and downloads custom R packages and data files from github.
You can save this locally as startup.sh and upload via gcloud or paste it into the interface into a metadata field called startup-script.
#!/bin/bash
GH_USER=$(curl http://metadata/computeMetadata/v1/instance/attributes/github-user -H "Metadata-Flavor: Google")
GH_REPO=$(curl http://metadata/computeMetadata/v1/instance/attributes/github-repo -H "Metadata-Flavor: Google")
GH_DATA=$(curl http://metadata/computeMetadata/v1/instance/attributes/github-data -H "Metadata-Flavor: Google")
GH_PAT=$(curl http://metadata/computeMetadata/v1/instance/attributes/github-pat -H "Metadata-Flavor: Google")

## Run Docker image
docker run --name rstudio-server \
       -d -p 8787:8787 \
       -e USER=ADMIN_USERNAME \
       -e PASSWORD=ADMIN_PW \
       -v /mnt/data/:/home/ \
       gcr.io/your-project-name/your-image-name

## Data files: update from github
cd /mnt/data/user_name/project_name/data
git pull 'https://'$GH_USER':'$GH_PAT'@github.com/'$GH_USER'/'$GH_DATA'.git'

## Private packages
# 1. pull from github
cd /mnt/data/R/privatePackageName
git pull 'https://'$GH_USER':'$GH_PAT'@github.com/'$GH_USER'/'$GH_REPO'.git'

# 2. Install the package from the local file you just updated from Git
sudo docker exec -it rstudio-server \
     sudo su - -c "R -e \"devtools::install('/home/R/localPackageName/')\""
You can debug your startup script by connecting to your instance and viewing cat /var/log/startupscript.log
You could also have a shutdown-script that would execute before any shutdown. Check out the list of metadata you can pass into scripts.
Launch
Now we relaunch the newly configured VM from your local computer, to test the startup script works. This will copy over all the configurations from the RStudio server above.
Save the startup.sh script to a file on your local machine, cd into the same folder and add the metadata:
gcloud compute instances add-metadata your-r-server-name \
  --metadata-from-file startup-script=startup.sh \
  --metadata github-user=YOUR-USER,github-repo=YOUR_REPO,github-data=YOUR_DATA,github-pat=YOUR_PAT
Now reset, cross fingers:
## reset
gcloud compute instances reset your-r-server-name
After a couple of minutes everything should now be running as configured before.
If you want to stop or start the server again, use the below:
## stop (no billing) but not deleted
gcloud compute instances stop your-r-server-name

## start up a stopped server
gcloud compute instances start your-r-server-name
The future
This should put you in a great position to support R-scripts to the team, but also in a scalable way where starting up faster and bigger machines is just a case of updating configuration files.
I would like to start up containers using the container manifest syntax but couldn’t get it to work for me yet, but for just one VM it means a few less lines in the start up script.
We also have OpenCPU and Shiny Server in the Google project, as we move into providing data output such as visualisations, APIs and dashboards. They are setup in a similar fashion, just swap out the Docker image for the appropriate version you need.